
Kai Bor H1073C use USB-TTL line strength [Brush tutorial]
Before my own machine because the brush machine problems, because no one has answered, and finally forced, or can only rely on their own, and now will share the brushing process, hoping to help the needs of children's shoes, here is mainly to provide a contact like me for the first time Children's shoes, there are wrong places, please correct it,
1, first of all, correct attitude, do not have fear, do not see the various technical terms on these data on the head, in fact, in the operating phase does not require you to understand what the electrician, computer knowledge, according to do Yes, and I guarantee that it is not complicated, of course, if children's shoes with these aspects of knowledge may be better to start, and when you encounter some problems, you can solve it yourself.
2. The above purchase links are all purchased by me. I hereby promise that I am not advertising. The reason for sending links is because of many posts before, because in order to avoid being said to be advertising, I just mentioned what to buy. Experienced friends know what to buy at a glance, but because I am a white, so when buying will be confusing, each store back and forth to ask, understand, and thus delayed some time, I think this will let There are a lot of melancholy fans like me. Here to help everyone save time and provide links for me to buy, at least let everyone know that I am using these things to operate. If you like, you can also buy tools like me. , The required hardware to software completely duplicates my brushing process. Of course, if you are veteran, you can also choose your own tools.
Firmware download: http://bbs.shafa.com/thread-1288861-1-1.html
This is a screenshot of my purchase, proving not to be an ad


According to the instructions in the reference, to use 3.3V voltage, just put the yellow block on USB-TTL on the side close to 3, that is, insert it in the photo, and the yellow block can be pulled out. To adjust the voltage, next to the number, 5 and 3,
The following begins the formal brushing process (tutorials with these two words make Xiaobai I dare not):
First of all do all the preparation (software, hardware),
1, the production of DuPont line: because the DuPont line is 2.54 pitch, plug in the USB-TTL no problem, but the interface spacing on the motherboard does not match, in the above several references, there are said to use 2.0 pitch, I did not try I used an earthy method to pick up the plastic shell from one end of the wire and then stripped off the insulation coating of the wire (use electrician's pliers to hold it lightly, and then drag it off. Take care not to use force, otherwise The copper wire inside will be cut off. Then, the scattered copper wire is clamped with tweezers, the copper wire is turned into a strand, and finally the head is bent into a ring, which is used to fit on the pins of the interface on the motherboard.
Remove one end of the plastic case, because it's plugged into USB-TTL

Twist the copper wire into one strand, then bend one circle. The circle should not be too big, because the distance between the pins on the main board is too tight and the circle is too big to easily touch each other.

Make three DuPont lines according to the color requirements

In addition, after downloading the firmware in advance, copy the install.img file to a USB flash drive, and insert the USB flash drive into the USB port on the back panel of the player.
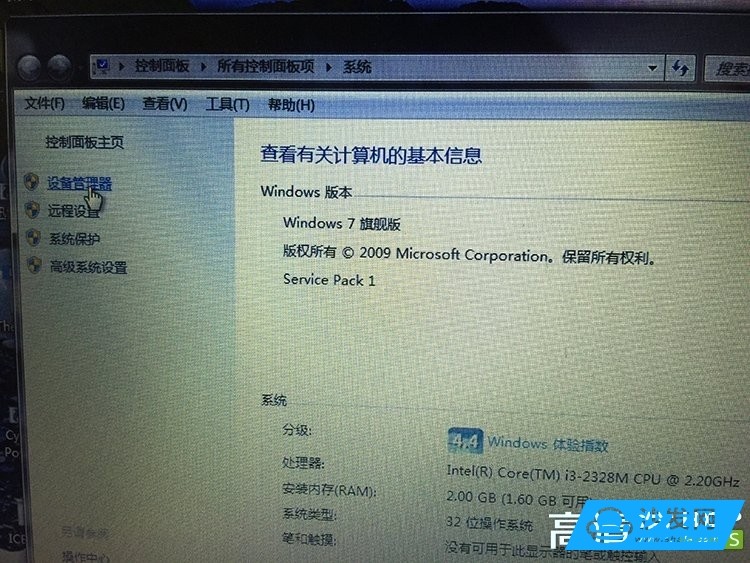
2, install the driver: because I usually use the mac os system, so some of the settings on the windows are not very clear, are checked on the Internet, there is a wrong place please automatically ignore, in order to brush machine to find a table mounted win7 32 Lenovo notebook, and then install the driver, plug in the USB-TTL will prompt new hardware, and then install the driver, the default is to use windows update installed, it is recommended to skip directly, and then on the desktop computer icon on the right properties, and then click on the left Device Manager, then you can see there is a port item, you can see the point of opening, install the driver to pay attention to the next, select the drive directory when the direct selection of the top of the win7 on it, do not go in, I Is to select the lower directory, the result is always installed unsuccessful, and finally to be installed twice, my understanding is to install two different hardware drivers, (do not understand, understand the children's shoes can be explained below), after the first success, Install a driver again, but also find the directory just installed once successful


After installing the driver
3, create a communication connection: reference materials are taught under the xp, using HyperTerminal, because win7 no super terminal, I find someone on the Internet from xp transplanted HyperTerminal can also be used, I also put In the disk drive, you can go down on your own. You can also use Putty and other tools on the Internet. I feel troubled.
Open hypertrm.exe, you can create a new connection, the main reference of the post also has a detailed description, do not understand can also see that when creating a connection, the best name of their own, do not use com + digital this, before I have a hint that there is a conflict in the name, just change it, for example, comm4, I just added a simple m

Then select the port, the connection created is used to communicate with the port, specifically selected which port you just installed the driver, seen under the device manager port, my com4, so I chose com4,

Then the port settings in this bit / second should be set to 115200, specifically why this number I do not quite understand, anyway, I was so set, and then the following data flow control selection

This time should not be connected, if you close the HyperTerminal, do not forget to save this connection, to avoid re-create each time, when you use the point of the upper left corner of the file, open you can find the connection you just saved
4, disassemble: open the player, my machine is H1073C, other machines have never used, pay attention to the point of demolition, the next down the best screw to find a place to put it, remember which screws are on which, When the other equipment is installed, the rear panel should not be screwed on first, otherwise, it will not fit into the housing. After the front panel is installed, the rear panel should be placed flat. The entire board will pass through the outermost iron casing and then it will be aligned. The panel, on the screw, otherwise not wear, the front and rear panels only need to screw down, can lay flat on it, do not need to fan, data lines are unplugged, because also test the boot, unplug it for a while also To install


When disassembling the hard disk interface needs to pay attention, there is a protruding plastic rod, the above is used to eject the hard disk box spring, after the machine has a screw screwed open, the plastic rod can be removed, the first time Do not know, I do not know, I use violence to get rid of the spring, but fortunately the spring is not deformed, and then this piece is a hard drive interface to the interface, is a folded over the shape, need to pull out, that is, my hand

5, wiring: After the machine is opened, find the upgrade with a six-pin connector, very easy to find, is a white plastic enclosure, there are 6 needles, you can see there are a number of left and right, 1 and 6, used to distinguish Which is the first needle,
This is the six-pin connector surrounded by the white plastic next to the coin in the photo.


Then, referring to the above references, here I copied it directly.
According to the forum users have verified the first three pin definition: 1. GND, 2. RXD, 3. TXD (this is what we want to use)
Connected with DuPont cable (1.GND for black, 2.RXD for blue, 3.TXD for yellow, 456 not)
Then on the corresponding USB port connected to VDD-empty, TXD-blue, RXD-yellow, GND-black
Reminder: It must be noted that when connecting usb-ttl, GND corresponds to the GND terminal of the motherboard, RXD corresponds to the TXD terminal of the motherboard, and TXD corresponds to the RXD terminal of the motherboard. In addition to GND, the other two lines must be cross-connected.


6, even the computer: Then plug the USB-TTl usb port in the port you just plugged into the drive, I can't try another port, or in the above reference, background knowledge that post there According to the introduction, some need to be plugged into the computer first and then connected to the main board. I did not find any difference here. If you have any problems, you may consider trying it out.

7. Start the flashing machine: After the USB-TTL cable is connected, open the connection you just created in the third step with the HyperTerminal. At this time, you should not connect. Open the switch on the player's back panel and press the switch on the front panel. Key, and then use the HyperTerminal to call, you can see the rows of code scrolling, and then press the key on the front panel to shut down, you can see the code no longer scroll, then hold down the TAB button on the computer, Just above the capital key, hold it down and don't loose it. Then press the player's front panel key to open the player. The dotdot post says when you see the "Rescue kernel in FLASH,..." message in the HyperTerminal. , release the "TAB" button, or over 2 seconds, I probably released in about 3 seconds, release the TAB button on the computer, to be honest because the code scrolling too fast, I did not See clearly, so here is not much to say, avoid misleading, if you want to understand, you can refer to the instructions in the reference to understand, brush machine can wait a little more time. If not, you can try several more times, observe the observation code more, see if there are words like error, and a little trick, you can see if the code is similar to ......../install.img, If at least this step represents that the system has started to check the installation files on the U disk, it indicates that the flashing machine has started.
If the last loop on the screen continues to loop like this code represents the end (here to borrow the funmonkey diagram, thank you), you can turn off the player, unplug the USB-TTL

Test results: Brush can play normally, but the subtitles mentioned in my post still do not solve, do not know why, some movies are not loaded subtitles, do not know the reason is not a firmware, who can provide a good The firmware, thank you, with the remote control key code, or brush into a brick and a line brush
PS: Yesterday, a new galactic escort team was added. After copying it into the hard drive, it was found that the hard disk was opened by the player. In addition to a Blu-ray movie, the other movie folders became \, and the clicked \ couldn't enter the directory. Do not know why, on the computer to view the movie are, but unfortunately after formatting the hard disk, re-enter the individual movie into it, the result is still like this, do not know why, it is estimated that may be my own reason, the above brush process should not The problem, after all, after the night of the brushing, can play normally, of course, if you still do not trust the brush machine, you can wait, so I solved this problem, you follow this tutorial brush
The current problem has basically been solved.
1, the directory becomes \\ problem, now they have returned to normal, and no longer appeared, presumably may be because of the reasons for the disassembly machine, do not know if this is the case, if children's shoes know, I hope to help answer Thank you,
2, subtitles,
The bdmv format has not yet been tried, I do not know whether it can be loaded now;
The general mkv format, through the remote control subtitles button, and then you can tune out, the specific operation is very simple, you know how to get by pressing twice, these days watching movies are normal, the only exception is the next version of the word One million ways of dying in the West, no subtitles, no srt subtitle matching matches, others are normal
In addition to seeking a good open Bor H1073c can use the system, would like to change the system, the best point of the network is powerful, want to toss toss the network, now it is very time-consuming every time so
1, first of all, correct attitude, do not have fear, do not see the various technical terms on these data on the head, in fact, in the operating phase does not require you to understand what the electrician, computer knowledge, according to do Yes, and I guarantee that it is not complicated, of course, if children's shoes with these aspects of knowledge may be better to start, and when you encounter some problems, you can solve it yourself.
2. The above purchase links are all purchased by me. I hereby promise that I am not advertising. The reason for sending links is because of many posts before, because in order to avoid being said to be advertising, I just mentioned what to buy. Experienced friends know what to buy at a glance, but because I am a white, so when buying will be confusing, each store back and forth to ask, understand, and thus delayed some time, I think this will let There are a lot of melancholy fans like me. Here to help everyone save time and provide links for me to buy, at least let everyone know that I am using these things to operate. If you like, you can also buy tools like me. , The required hardware to software completely duplicates my brushing process. Of course, if you are veteran, you can also choose your own tools.
Firmware download: http://bbs.shafa.com/thread-1288861-1-1.html
This is a screenshot of my purchase, proving not to be an ad
According to the instructions in the reference, to use 3.3V voltage, just put the yellow block on USB-TTL on the side close to 3, that is, insert it in the photo, and the yellow block can be pulled out. To adjust the voltage, next to the number, 5 and 3,
The following begins the formal brushing process (tutorials with these two words make Xiaobai I dare not):
First of all do all the preparation (software, hardware),
1, the production of DuPont line: because the DuPont line is 2.54 pitch, plug in the USB-TTL no problem, but the interface spacing on the motherboard does not match, in the above several references, there are said to use 2.0 pitch, I did not try I used an earthy method to pick up the plastic shell from one end of the wire and then stripped off the insulation coating of the wire (use electrician's pliers to hold it lightly, and then drag it off. Take care not to use force, otherwise The copper wire inside will be cut off. Then, the scattered copper wire is clamped with tweezers, the copper wire is turned into a strand, and finally the head is bent into a ring, which is used to fit on the pins of the interface on the motherboard.
Remove one end of the plastic case, because it's plugged into USB-TTL
Twist the copper wire into one strand, then bend one circle. The circle should not be too big, because the distance between the pins on the main board is too tight and the circle is too big to easily touch each other.
Make three DuPont lines according to the color requirements
In addition, after downloading the firmware in advance, copy the install.img file to a USB flash drive, and insert the USB flash drive into the USB port on the back panel of the player.
2, install the driver: because I usually use the mac os system, so some of the settings on the windows are not very clear, are checked on the Internet, there is a wrong place please automatically ignore, in order to brush machine to find a table mounted win7 32 Lenovo notebook, and then install the driver, plug in the USB-TTL will prompt new hardware, and then install the driver, the default is to use windows update installed, it is recommended to skip directly, and then on the desktop computer icon on the right properties, and then click on the left Device Manager, then you can see there is a port item, you can see the point of opening, install the driver to pay attention to the next, select the drive directory when the direct selection of the top of the win7 on it, do not go in, I Is to select the lower directory, the result is always installed unsuccessful, and finally to be installed twice, my understanding is to install two different hardware drivers, (do not understand, understand the children's shoes can be explained below), after the first success, Install a driver again, but also find the directory just installed once successful
After installing the driver
3, create a communication connection: reference materials are taught under the xp, using HyperTerminal, because win7 no super terminal, I find someone on the Internet from xp transplanted HyperTerminal can also be used, I also put In the disk drive, you can go down on your own. You can also use Putty and other tools on the Internet. I feel troubled.
Open hypertrm.exe, you can create a new connection, the main reference of the post also has a detailed description, do not understand can also see that when creating a connection, the best name of their own, do not use com + digital this, before I have a hint that there is a conflict in the name, just change it, for example, comm4, I just added a simple m
Then select the port, the connection created is used to communicate with the port, specifically selected which port you just installed the driver, seen under the device manager port, my com4, so I chose com4,
Then the port settings in this bit / second should be set to 115200, specifically why this number I do not quite understand, anyway, I was so set, and then the following data flow control selection
This time should not be connected, if you close the HyperTerminal, do not forget to save this connection, to avoid re-create each time, when you use the point of the upper left corner of the file, open you can find the connection you just saved
4, disassemble: open the player, my machine is H1073C, other machines have never used, pay attention to the point of demolition, the next down the best screw to find a place to put it, remember which screws are on which, When the other equipment is installed, the rear panel should not be screwed on first, otherwise, it will not fit into the housing. After the front panel is installed, the rear panel should be placed flat. The entire board will pass through the outermost iron casing and then it will be aligned. The panel, on the screw, otherwise not wear, the front and rear panels only need to screw down, can lay flat on it, do not need to fan, data lines are unplugged, because also test the boot, unplug it for a while also To install
When disassembling the hard disk interface needs to pay attention, there is a protruding plastic rod, the above is used to eject the hard disk box spring, after the machine has a screw screwed open, the plastic rod can be removed, the first time Do not know, I do not know, I use violence to get rid of the spring, but fortunately the spring is not deformed, and then this piece is a hard drive interface to the interface, is a folded over the shape, need to pull out, that is, my hand
5, wiring: After the machine is opened, find the upgrade with a six-pin connector, very easy to find, is a white plastic enclosure, there are 6 needles, you can see there are a number of left and right, 1 and 6, used to distinguish Which is the first needle,
This is the six-pin connector surrounded by the white plastic next to the coin in the photo.
Then, referring to the above references, here I copied it directly.
According to the forum users have verified the first three pin definition: 1. GND, 2. RXD, 3. TXD (this is what we want to use)
Connected with DuPont cable (1.GND for black, 2.RXD for blue, 3.TXD for yellow, 456 not)
Then on the corresponding USB port connected to VDD-empty, TXD-blue, RXD-yellow, GND-black
Reminder: It must be noted that when connecting usb-ttl, GND corresponds to the GND terminal of the motherboard, RXD corresponds to the TXD terminal of the motherboard, and TXD corresponds to the RXD terminal of the motherboard. In addition to GND, the other two lines must be cross-connected.
6, even the computer: Then plug the USB-TTl usb port in the port you just plugged into the drive, I can't try another port, or in the above reference, background knowledge that post there According to the introduction, some need to be plugged into the computer first and then connected to the main board. I did not find any difference here. If you have any problems, you may consider trying it out.
7. Start the flashing machine: After the USB-TTL cable is connected, open the connection you just created in the third step with the HyperTerminal. At this time, you should not connect. Open the switch on the player's back panel and press the switch on the front panel. Key, and then use the HyperTerminal to call, you can see the rows of code scrolling, and then press the key on the front panel to shut down, you can see the code no longer scroll, then hold down the TAB button on the computer, Just above the capital key, hold it down and don't loose it. Then press the player's front panel key to open the player. The dotdot post says when you see the "Rescue kernel in FLASH,..." message in the HyperTerminal. , release the "TAB" button, or over 2 seconds, I probably released in about 3 seconds, release the TAB button on the computer, to be honest because the code scrolling too fast, I did not See clearly, so here is not much to say, avoid misleading, if you want to understand, you can refer to the instructions in the reference to understand, brush machine can wait a little more time. If not, you can try several more times, observe the observation code more, see if there are words like error, and a little trick, you can see if the code is similar to ......../install.img, If at least this step represents that the system has started to check the installation files on the U disk, it indicates that the flashing machine has started.
If the last loop on the screen continues to loop like this code represents the end (here to borrow the funmonkey diagram, thank you), you can turn off the player, unplug the USB-TTL
Test results: Brush can play normally, but the subtitles mentioned in my post still do not solve, do not know why, some movies are not loaded subtitles, do not know the reason is not a firmware, who can provide a good The firmware, thank you, with the remote control key code, or brush into a brick and a line brush
PS: Yesterday, a new galactic escort team was added. After copying it into the hard drive, it was found that the hard disk was opened by the player. In addition to a Blu-ray movie, the other movie folders became \, and the clicked \ couldn't enter the directory. Do not know why, on the computer to view the movie are, but unfortunately after formatting the hard disk, re-enter the individual movie into it, the result is still like this, do not know why, it is estimated that may be my own reason, the above brush process should not The problem, after all, after the night of the brushing, can play normally, of course, if you still do not trust the brush machine, you can wait, so I solved this problem, you follow this tutorial brush
The current problem has basically been solved.
1, the directory becomes \\ problem, now they have returned to normal, and no longer appeared, presumably may be because of the reasons for the disassembly machine, do not know if this is the case, if children's shoes know, I hope to help answer Thank you,
2, subtitles,
The bdmv format has not yet been tried, I do not know whether it can be loaded now;
The general mkv format, through the remote control subtitles button, and then you can tune out, the specific operation is very simple, you know how to get by pressing twice, these days watching movies are normal, the only exception is the next version of the word One million ways of dying in the West, no subtitles, no srt subtitle matching matches, others are normal
In addition to seeking a good open Bor H1073c can use the system, would like to change the system, the best point of the network is powerful, want to toss toss the network, now it is very time-consuming every time so
Table Top Stove,Single Burner Gas Cooker,Stainless Steel Portable Stove,Indoor Portable Gas Stoves
xunda science&technology group co.ltd , https://www.gasstove.be